Blog
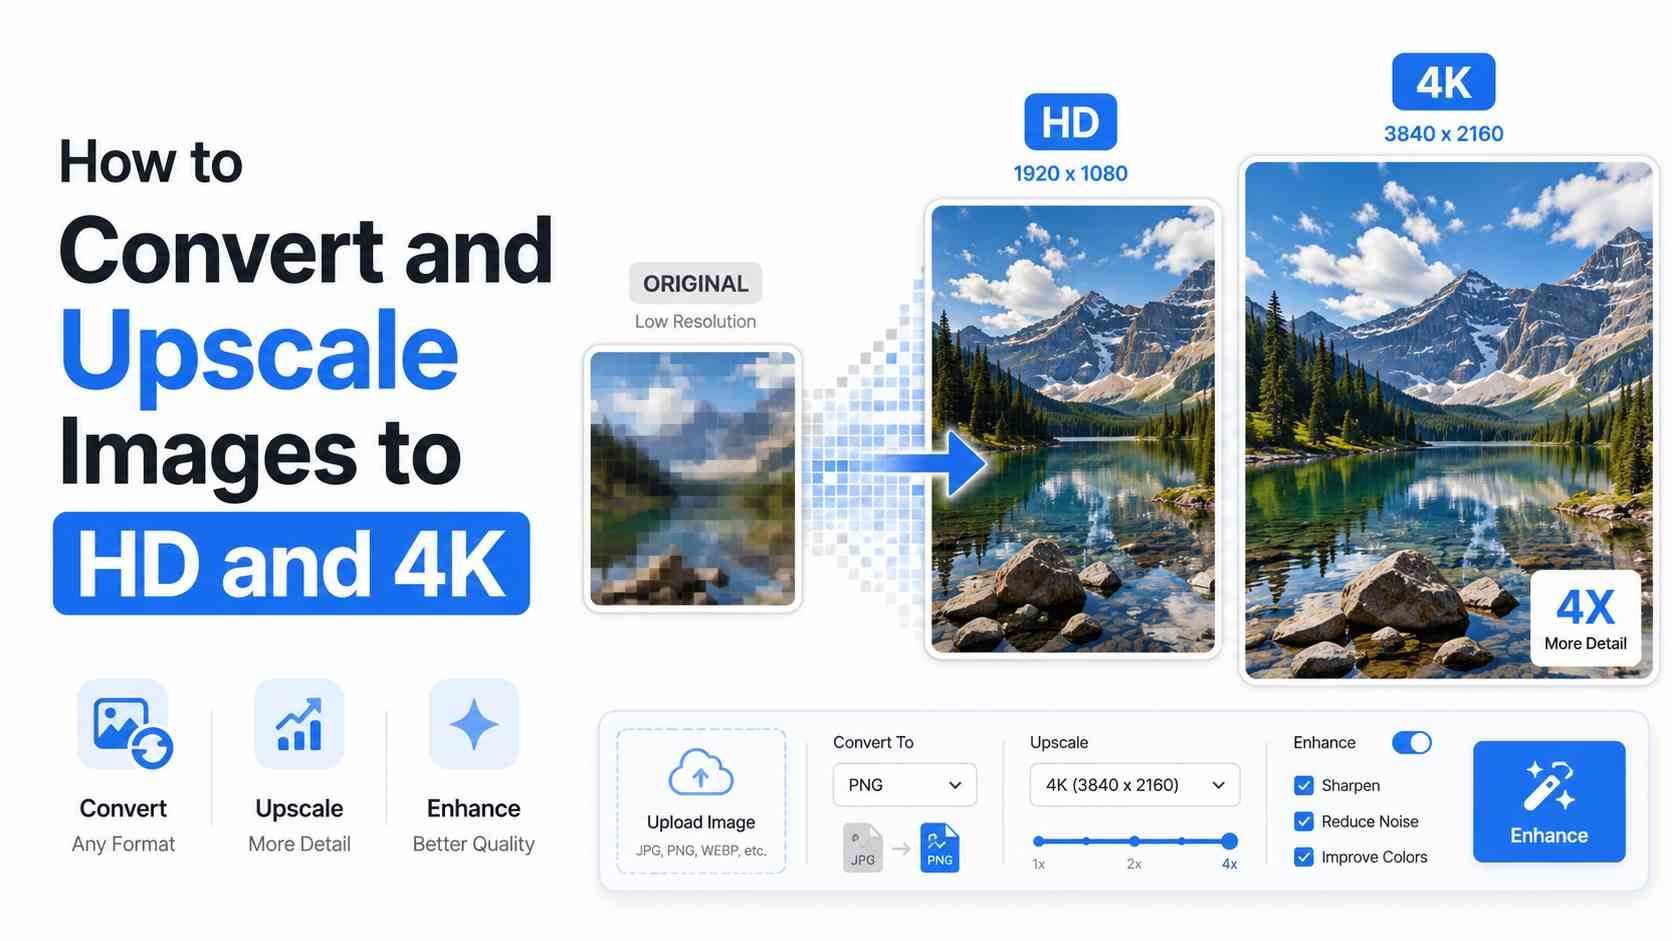
How to Convert and Upscale Images to HD and 4K
We have all been there. You find an old photo, product image, logo, screenshot, or social media graphic that looks perfect in meaning but poor in quality. Maybe it is blurry, too small, pixelated, compressed, or simply not sharp enough for modern screens. You try zooming in, but the image falls apart. You upload it somewhere, and it looks soft. You add it to a website, and it feels unprofessional.
That is exactly where image upscaling and HD conversion become useful.
Today, high-quality visuals are no longer optional. Whether you run a blog, online store, portfolio, social media page, business website, YouTube channel, or digital product, your images shape the first impression people have of your content. A sharp image can make a page look trustworthy. A blurry image can make even good content feel outdated.
But improving image quality is not as simple as increasing the width and height. If you resize an image without understanding resolution, formats, compression, and sharpening, you can easily make it worse. The goal is not only to make an image bigger. The real goal is to make it clearer, cleaner, and more useful for the place where it will appear.
In this guide, we will break down how image upscaling works, when to use an HD image converter, how 4K image enhancement differs from basic resizing, what formats to choose, and how to avoid common mistakes that damage quality. By the end, you will know how to prepare images that look professional on websites, social media, print materials, presentations, and large displays.
What Does Image Upscaling Mean?
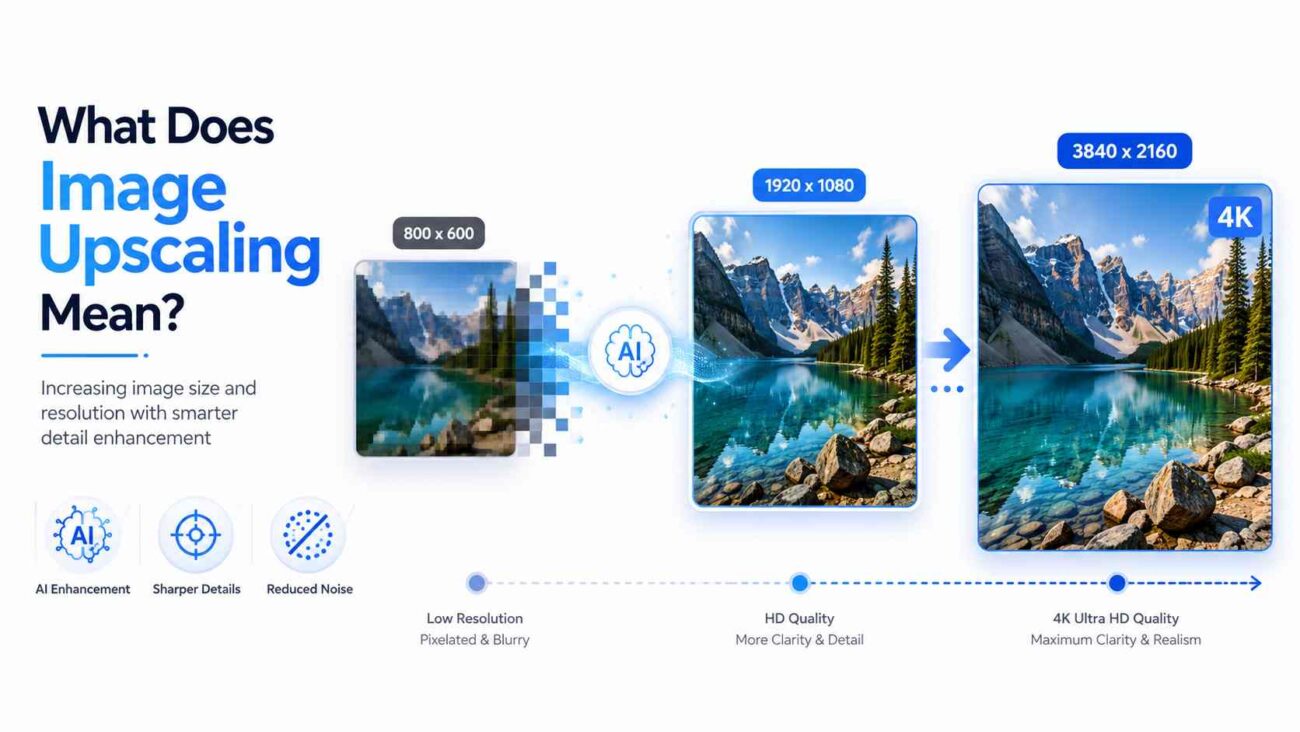
Image upscaling means increasing the size or resolution of an image. For example, you may take a small 800 by 600 pixel photo and enlarge it to 1920 by 1080 pixels for HD use, or even 3840 by 2160 pixels for 4K use.
At first, this sounds simple. However, an image is made of pixels. When you enlarge it, the software has to create extra pixels that were not in the original file. Basic resizing tools do this by stretching and guessing nearby colors. That can lead to blur, jagged edges, distorted details, and a fake-looking result.
Modern image upscaling tools, especially AI-based tools, work differently. Instead of only stretching the image, they analyze patterns, edges, textures, and shapes. Then they attempt to rebuild the missing detail more naturally. This can make faces look sharper, product edges cleaner, text more readable, and backgrounds less noisy.
Basic Resizing vs Smart Upscaling
Basic resizing changes the dimensions of the image. It may be useful when you only need a slightly larger version or when quality is not extremely important.
Smart upscaling uses more advanced processing. It is better for old photos, ecommerce images, marketing graphics, thumbnails, posters, and any visual that needs to look polished.
Here is the simple difference:
- Basic resizing makes an image bigger.
- Smart upscaling tries to make an image bigger and better.
That difference matters a lot when your image will appear on a large screen, high-resolution display, or important landing page.
What Is HD Image Conversion?
HD image conversion usually means changing an image into a higher quality, higher resolution, or more suitable format for digital use. It can involve resizing, sharpening, reducing noise, converting file formats, or optimizing compression.
For example, someone may use an HD image converter to turn a low-resolution JPG into a cleaner PNG or WebP file. Another person may convert a small product photo into a larger HD version for an online store. A blogger may convert images into web-friendly formats so pages load faster without looking blurry.
HD does not always mean the image magically becomes perfect. True HD quality depends on the original file, the tool used, and how the final image is exported.
Common HD Image Sizes
HD image quality is often linked to pixel dimensions:
- 1280 x 720 pixels is commonly called HD
- 1920 x 1080 pixels is Full HD
- 2560 x 1440 pixels is Quad HD or 2K
- 3840 x 2160 pixels is 4K UHD
For websites and social media, Full HD is often enough. For banners, presentations, large screens, and premium visuals, 4K may be useful. However, bigger is not always better. A 4K image can look great, but it can also create a heavy file that slows down your website if not optimized properly.
Why Image Quality Matters More Than Ever
People judge digital content quickly. Before they read your headline or product description, they notice the visuals. Clear images can build confidence, while poor-quality images can create doubt.
This matters across many industries.
An ecommerce store with sharp product photos feels more trustworthy. A real estate website with crisp property images gets more attention. A restaurant menu with clean food photography looks more appealing. A blog with optimized visuals feels more professional. A designer portfolio with high-quality images shows attention to detail.
Search engines also care about user experience. Images that are too large can slow down a page. Images that are poorly named or missing alt text can reduce visibility in image search. Images that are blurry may hurt engagement because users leave faster.
So image quality is not only a design issue. It affects branding, conversion, SEO, accessibility, and user trust.
When Should You Upscale an Image?
You should upscale an image when the current size is too small for its intended use, but the image itself is still valuable.
For example, image upscaling makes sense when:
| Situation | Why Upscaling Helps |
|---|---|
| You Have an Old Photo | Old family photos, scanned images, and archive pictures are often small or soft. Upscaling can help restore detail and make them suitable for digital albums, frames, or prints. |
| You Need Better Product Images | Online shoppers depend on visuals. If your product images are too small or blurry, customers may not feel confident enough to buy. Upscaling can improve clarity, especially for catalog images, thumbnails, and close-up product shots. |
| You Are Creating Website Banners | A small image stretched across a website hero section often looks pixelated. Upscaling can help prepare the image for a wider layout. |
| You Want Social Media Graphics | Platforms compress images heavily. Starting with a higher-quality image gives you a better chance of keeping the final upload sharp. |
| You Need 4K Display Quality | If you are preparing visuals for TVs, digital signage, event screens, or large presentations, you may need to upscale the image to 4K so it looks cleaner on high-resolution displays. |
When Should You Avoid Upscaling?
Upscaling is helpful, but it has limits. It cannot always fix a badly damaged image.
Avoid relying on upscaling alone when:
| Limitation | Why It Matters |
|---|---|
| The Original Image Is Extremely Blurry | If the image has no visible detail, the tool may have to guess too much. The result can look artificial or inaccurate. |
| The Image Has Heavy Compression Artifacts | Low-quality JPG files often contain blocky marks, color bands, and rough edges. Some tools can reduce these issues, but they may not remove them completely. |
| The Image Contains Small Text | Text is difficult to upscale cleanly. If a screenshot or graphic contains small writing, it may be better to recreate the text manually. |
| You Need Legal or Professional Accuracy | For medical, legal, scientific, or identity-related images, enhancement should be handled carefully. Upscaling can alter visual details, which may be problematic when accuracy is critical. |
How AI Image Upscaling Works
AI image upscaling uses trained models to predict how a higher resolution version of an image should look. Instead of treating the image as a simple grid of pixels, AI tools look for patterns.
For example, if the tool detects a face, it may improve skin texture, eyes, hair, and edges. If it detects a landscape, it may enhance trees, clouds, water, and mountains. If it detects a product photo, it may sharpen outlines and reduce noise.
This is why AI upscaling often looks better than traditional resizing. It does not just enlarge the file. It reconstructs visual information.
However, AI is not magic. Sometimes it can over-sharpen details, smooth skin too much, create unrealistic textures, or change the appearance of objects. That is why you should always review the final result before publishing.
Best Image Formats for HD and 4K Conversion
Choosing the right image format is just as important as choosing the right size. The format affects quality, file size, transparency, compatibility, and loading speed.
JPG
JPG is one of the most common image formats. It is good for photographs, blog images, and social media visuals. JPG files are usually smaller, but they use lossy compression. That means some image data is removed to reduce file size.
Use JPG for:
- Photos
- Blog images
- Social media posts
- Large image galleries
Avoid JPG for:
- Logos
- Transparent images
- Graphics with sharp text
- Images that need repeated editing
PNG
PNG keeps image quality better than JPG and supports transparency. It is useful for logos, icons, graphics, screenshots, and images with text. However, PNG files can be much larger than JPG files.
Use PNG for:
- Logos
- Screenshots
- Transparent images
- Graphics with text
- Interface images
Avoid PNG for:
- Very large photo galleries
- Heavy website banners unless optimized
WebP
WebP is a modern image format designed for good quality with smaller file sizes. It supports both lossy and lossless compression and can also support transparency.
Use WebP for:
- Website images
- Blog visuals
- Ecommerce product images
- Performance-focused pages
AVIF
AVIF is a newer format that can provide excellent compression and image quality. It is useful for modern websites, but compatibility and workflow support should still be checked depending on your audience and platform.
Use AVIF for:
- Advanced website optimization
- Large hero images
- Performance-sensitive websites
TIFF
TIFF is often used for high-quality print and professional editing. It is not ideal for normal website use because file sizes are large.
Use TIFF for:
- Print workflows
- Archiving
- Professional photography editing
Step by Step: How to Convert and Upscale an Image Properly

If you want the best result, do not simply upload an image and click export. Follow a careful workflow.
Step 1: Start With the Best Original File
Always begin with the highest quality version you have. A clean original gives the upscaling tool more detail to work with.
For example, if you have the same image from WhatsApp, Instagram, and the original camera folder, use the camera version. Messaging apps and social platforms often compress images, which reduces quality.
Step 2: Decide the Final Use
Before converting, ask where the image will be used.
Is it for a website? A social post? A product page? A print flyer? A YouTube thumbnail? A 4K display?
The final use decides the size, format, and compression level.
For example, a website image should be sharp but lightweight. A print image may need higher resolution. A presentation image should be clear on large screens.
Step 3: Choose the Right Output Size
Do not upscale more than necessary. If your blog content area is 1200 pixels wide, exporting a 4000 pixel wide image may only make the file heavier.
For most web use, 1200 to 2000 pixels wide is enough. For full-screen hero images, 1920 pixels wide may work well. For 4K screens, 3840 pixels wide may be appropriate.
Step 4: Use Smart Upscaling
Use a tool that supports intelligent enlargement instead of basic resizing. A good tool should improve edges, reduce noise, and preserve natural detail.
At this stage, a reliable HD image converter can help you prepare a cleaner, larger image without forcing you to manage every technical setting manually.
Step 5: Adjust Sharpness Carefully
Sharpening can make an image look clearer, but too much sharpening creates halos, rough edges, and an unnatural appearance.
Use moderate sharpening. Zoom in to check faces, text, product edges, and backgrounds. If the image starts looking harsh, reduce sharpening.
Step 6: Remove Noise
Noise appears as grain, speckles, or rough texture, especially in low-light photos. Noise reduction can help, but too much of it can make the image look plastic.
The best approach is balance. Reduce visible noise while keeping important texture.
Step 7: Export in the Best Format
For websites, WebP is often a strong choice because it balances quality and file size. For photos, JPG still works well if properly compressed. For graphics with transparency, PNG or WebP may be better.
Step 8: Compress Without Destroying Quality
Compression reduces file size. This is important for website speed. However, aggressive compression can make images look blurry or blocky.
After export, compare the original and final image. If the quality loss is obvious, increase the quality setting or choose a better format.
Step 9: Rename the File for SEO
Instead of uploading a file named IMG_4982.jpg, use a descriptive file name.
Example:
4k-product-photo-conversion.jpg
clear-hd-real-estate-image.webp
modern-office-banner-image.jpg
This helps organization and can support image SEO.
Step 10: Add Alt Text
Alt text describes an image for accessibility and search engines. Keep it natural and useful.
Bad alt text:
image photo best 4k hd converter online
Good alt text:
Clear 4K product photo of a wireless headphone on a white background
Alt text should describe the image, not stuff keywords.
Pros and Cons of Image Upscaling
Image upscaling can be powerful, but it is not perfect. Understanding both sides helps you use it wisely.
Pros
| Benefit | Why It Matters |
|---|---|
| Better Visual Quality | Upscaling can make small images look cleaner, sharper, and more suitable for modern screens and displays. |
| Saves Time | Instead of recreating an image from scratch, you can enhance an existing visual and achieve better results more quickly. |
| Useful for Old Images | Old photos, archived files, and scanned visuals can often be improved, helping preserve memories and historical content. |
| Better Branding | High-quality images help websites, portfolios, advertisements, and marketing materials appear more professional and trustworthy. |
| Helpful for Ecommerce | Sharper product photos can improve customer confidence and make it easier for shoppers to inspect product details before making a purchase. |
Cons
| Consideration | Why It Matters |
|---|---|
| Results Depend on the Original | A very poor-quality image may still look poor after upscaling. The better the source image, the better the final result is likely to be. |
| AI Can Add Fake Details | AI upscaling tools may generate details that were not present in the original image. This can work well for creative projects but may be unsuitable when accuracy is important. |
| Large Files Can Slow Websites | A 4K image can provide excellent visual quality, but it should be optimized properly before being used online to avoid slower page loading times. |
| Overprocessing Looks Unnatural | Excessive sharpening, smoothing, or noise reduction can make images appear artificial and reduce their natural look. |
Practical Tips for Better Image Quality
| Tip | Why It Helps |
|---|---|
| Check the Image at 100 Percent Zoom | Do not judge image quality from a small preview alone. View the image at full size to inspect important details, sharpness, and any visible artifacts. |
| Use Natural Lighting When Possible | If you are taking new photos, lighting matters more than editing. A well-lit image will generally upscale better than a dark or grainy one. |
| Avoid Repeated Saving | Every time a JPG is saved, some image quality may be lost. Keep a master copy in the highest available quality whenever possible. |
| Do Not Screenshot Images Unless Necessary | Screenshots often reduce image quality and resolution. Downloading the original image file usually produces better results for upscaling. |
| Keep Faces Natural | When enhancing portraits, avoid settings that make skin overly smooth or eyes unnaturally sharp. Natural-looking results are typically more appealing and realistic. |
| Create Multiple Versions | For websites, create different image sizes for desktop, tablet, and mobile devices. This helps pages load faster and ensures images look good across various screen sizes. |
| Balance Quality and Speed | High-quality images are important, but large files can slow down websites. Compress images carefully and use modern formats when possible to maintain both quality and performance. |
Image Upscaling for Websites and SEO
Image upscaling should support website performance, not hurt it. Search engines focus heavily on user experience, and image loading speed plays a major role in that.
Use Responsive Images
Responsive images allow browsers to load the right image size for each device. A mobile user does not need to download a massive desktop image.
This improves speed, saves bandwidth, and creates a better experience.
Use Descriptive File Names
Search engines cannot understand images the same way humans do. File names give helpful context.
Instead of:
photo-final-version-new2.jpg
Use:
hd-converted-product-image.jpg
Add Meaningful Alt Text
Alt text helps users who rely on screen readers and also helps search engines understand the image.
Write alt text like a human description. Avoid keyword stuffing.
Compress Images Before Uploading
Large files can slow down your website. Use compression tools to reduce size while keeping acceptable quality.
Use Lazy Loading
Lazy loading allows images lower on the page to load only when users scroll near them. This can improve initial page speed.
Choose Web-Friendly Formats
For many websites, WebP offers strong quality with smaller file sizes. AVIF may provide even better compression in some cases, but always check compatibility with your website setup.
Image Upscaling for Ecommerce
Product images are one of the most important parts of ecommerce. Customers cannot touch the product, so they rely on photos.
A blurry image can make a product look cheap. A sharp image can make it feel more trustworthy.
What Ecommerce Images Need
Strong ecommerce images should be:
- Clear
- Bright
- Properly cropped
- Consistent in size
- Fast loading
- Accurate to the real product
Upscaling can help when supplier images are too small or when older product photos need improvement. However, do not use upscaling to misrepresent product texture, color, or details. The goal is clarity, not deception.
Best Practice for Product Images
Use a clean background, show multiple angles, include zoomable images, and keep colors accurate. If the image is for a marketplace, follow that platform’s image requirements.
Image Upscaling for Social Media
Social media platforms compress images after upload. This means your image may lose some quality even if it looked perfect before uploading.
To get better results, start with a clean, high-resolution image. Export it in the recommended size for the platform. Avoid uploading tiny images and expecting the platform to fix them.
Tips for Social Media Images
Use sharp source files, keep text large enough to read, avoid over-compression, and preview the post before publishing. For thumbnails, make sure the main subject is visible even on small screens.
Image Upscaling for Print
Print works differently from screens. On screens, image quality is measured in pixels. In print, quality is often discussed using DPI or PPI.
A small image may look fine on a phone but poor on a printed flyer. If you plan to print, you need enough resolution for the physical size of the final print.
Simple Print Rule
For high-quality small prints, 300 PPI is commonly used as a professional standard. Large banners may not need the same pixel density because people view them from farther away.
Before printing, always check with the printer or printing service. They can tell you the required dimensions, color format, and file type.
Common Mistakes to Avoid
| Common Mistake | Why It Can Be a Problem |
|---|---|
| Upscaling Too Much | Turning a tiny image into a huge 4K file can create unrealistic or artificial-looking details. Upscale only as much as necessary for the intended use. |
| Ignoring File Size | Very large image files can slow down websites and affect user experience. Always optimize images before uploading them online. |
| Using the Wrong Format | Different image formats serve different purposes. A JPG logo may appear blurry around the edges, while a PNG photo may result in an unnecessarily large file size. Choose the format based on the image type and use case. |
| Over-Sharpening | Excessive sharpening can create harsh edges, halos, and an unnatural appearance. Aim for subtle enhancements that preserve a realistic look. |
| Forgetting Mobile Users | An image that looks great on desktop may load slowly on mobile devices. Use responsive image sizes to improve performan |
FAQ
| Question | Answer |
|---|---|
| What is the best way to upscale an image without losing quality? | Start with the highest-quality original file available and use a smart upscaling tool rather than basic resizing. After upscaling, apply light sharpening, reduce noise carefully, and export in a suitable format such as WebP, JPG, or PNG based on your needs. |
| Can I convert a low-resolution image to HD? | Yes, but the result depends on the quality of the original file. A clear, small image usually converts to HD more successfully than a blurry or heavily compressed image. |
| Is 4K always better than HD? | Not necessarily. 4K is ideal for large screens, presentations, digital signage, and high-resolution displays. For many websites and everyday uses, Full HD provides excellent quality with smaller file sizes and faster loading times. |
| Which image format is best for websites? | WebP is often an excellent choice because it offers high quality with smaller file sizes. JPG works well for photographs, PNG is useful for transparency and graphics, and AVIF can provide even better compression for performance-focused websites. |
| Does image upscaling improve SEO? | Upscaling alone does not directly improve SEO. However, high-quality, optimized images can enhance user experience. Combined with compression, descriptive file names, alt text, responsive sizing, and fast loading speeds, images can contribute to better SEO performance. |
| Why does my image look blurry after uploading online? | Many platforms automatically compress uploaded images. Blurriness can also occur if the image is uploaded at the wrong dimensions, compressed too heavily, or stretched beyond its original resolution. |
| Can AI upscaling fix any image? | No. AI upscaling can improve many images, but it cannot perfectly recover details that were never captured in the original file. Extremely blurry, damaged, or highly compressed images will still have limitations. |
| Should I use PNG or JPG for HD images? | Use JPG for most photographs because it keeps file sizes relatively small. Use PNG for graphics, logos, screenshots, and images that require transparency. For websites, WebP is often a better alternative to both because it balances quality and file size effectively. |
Professional Disclaimer
This article is for general educational and informational purposes only. Image enhancement, upscaling, and conversion results can vary depending on the original file quality, software used, compression settings, display type, and final use case. For professional printing, legal documentation, medical images, forensic work, or brand-critical commercial visuals, always consult a qualified specialist or follow the technical requirements provided by your platform, printer, designer, or production team.
Conclusion
Image upscaling and HD conversion are valuable tools when used with the right expectations. They can help you improve old photos, sharpen product images, prepare website banners, create better social media visuals, and adapt images for HD or 4K displays.
The key is balance. Bigger does not automatically mean better. A good image workflow starts with the best original file, uses smart upscaling, chooses the correct output size, selects the right format, and compresses the final file carefully. For websites, image quality must work together with speed, accessibility, and SEO.
If you treat image enhancement as part of a complete visual strategy instead of a quick one-click fix, your content will look more professional, load more efficiently, and create a stronger impression on your audience.